Totally Tie-Dye: Jump on 2021’s Hottest DIY Trend
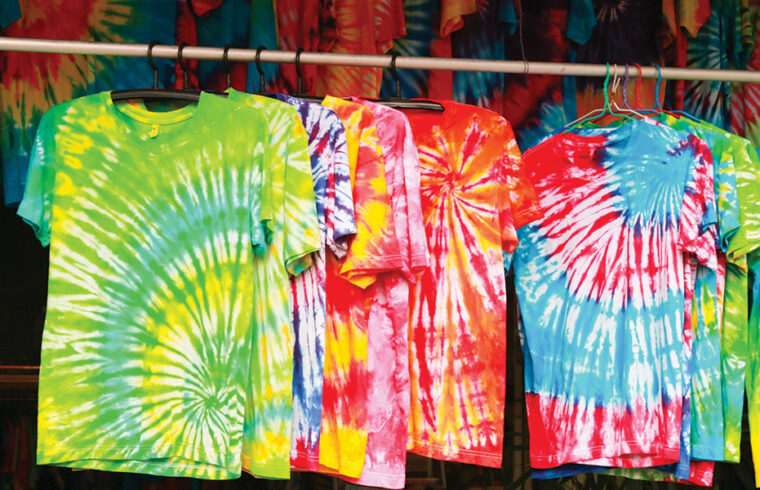
One of the biggest fashion trends we’ve seen so far in 2021 is the reemergence of tie-dye! What may seem like a retired style now reserved exclusively for camp activities and middle school projects, is now making its way back into the mainstream. If you want to jump on the trend, but maybe haven’t done tie-dye since you were a kid, we’ve got you covered! Tie-dye is an easy at-home activity that only takes a few supplies, and you can even get your kiddos involved!
There are endless ways to tie dye your clothes and you can tie-dye just about anything, but we are focusing on the classic spiral tie-dye shirt!
MATERIALS NEEDED:
White shirt made of 100% natural fibers: 100% white cotton is best. You can use another color, but white will give the most vibrant results! The natural materials like cotton or rayon will also ensure that the dye absorbs into the fabric properly.
Tie Dye kit: You can pick one up at Walmart or online! It should come with everything you need, but if not, you will need:
- Rubber bands
- Gloves
- Dye powder
- Squeeze bottles for the dye mixture
- Water
- 1 gallon size resealable plastic bag per each item you’re tie dying (a trash bag works too)
INSTRUCTIONS:
- Wash your white shirt. This will get the sizing out and make your shirt more receptive to dye.
- Make sure your shirt is still a bit damp and lay it out on a table — preferably a place you don’t mind getting dye on! (You can place it on top of a trash bag or in a bin, to contain the excess dye).
- To create the spiral look, pinch the fabric in the center of your shirt. Then, with the center pinched, twist the shirt in one direction until your entire shirt is in a spiral shape, keeping it as flat as you can like a pancake.
- Next, use three to four rubber bands to secure the shirt in this spiral shape. Be sure to crisscross the rubber bands so that you’re left with six to eight evenly spaced triangle- shaped sections — almost like pizza slices!
- Put on your gloves, pour a full packet of dye powder in a bottle, and fill the bottle to the top with water, making sure not to overflow the container. Some kits come with the die already in the container, so all you need to do is add water. Shake well!
- Now you’re ready to tie-dye! With your dye mixtures, use whichever colors you like to fill in each triangular section. There is no right or wrong way as to how many colors you use to fill in these sections, but remember that the more dye you use to saturate the fabric, the more color will be on your shirt. If you only use a little dye in each section, your spiral will turn out with lots of white spots!
- Flip over your shirt and repeat step #6 on the other side!
- Place your tie-dye creation in one of the gallon plastic bags, seal and let sit for 8 to 24 hours to let the dye set.
- After the 8 to 24 hours are up, rinse your rubber banded shirt under cold water, until the water runs clear and excess dye is removed.
- Remove the rubber bands and launder in the washing machine with hot water separately from other clothes as to not accidentally dye any other clothing. Dry the shirt separately.
Our Tip:
To take the tie-dye trend one step further, try tie- dying a custom pair of shorts or sweatpants for the ultimate 2021 at-home comfy look!
If you want more than one spiral, or want the spiral in a different location, just start the design in a different spot!
Wherever you pinch the fabric in step #3 will always be the center of your spiral!
*Always supervise children and never leave them alone when doing tie-dye.

